
A detailed guide on how to get the most out of your Google nexus 5 or 6’s camera.
The Apple iPhone is famous for having an excellent camera, with a simple UI that allows people who do not have a clue about photography take great pictures. We have seen a trend since iOS 7 that there are more camera apps which cater to the higher end of the photography market. These apps help them control factors like shutter speed, ISO and white balance.
The Breakdown
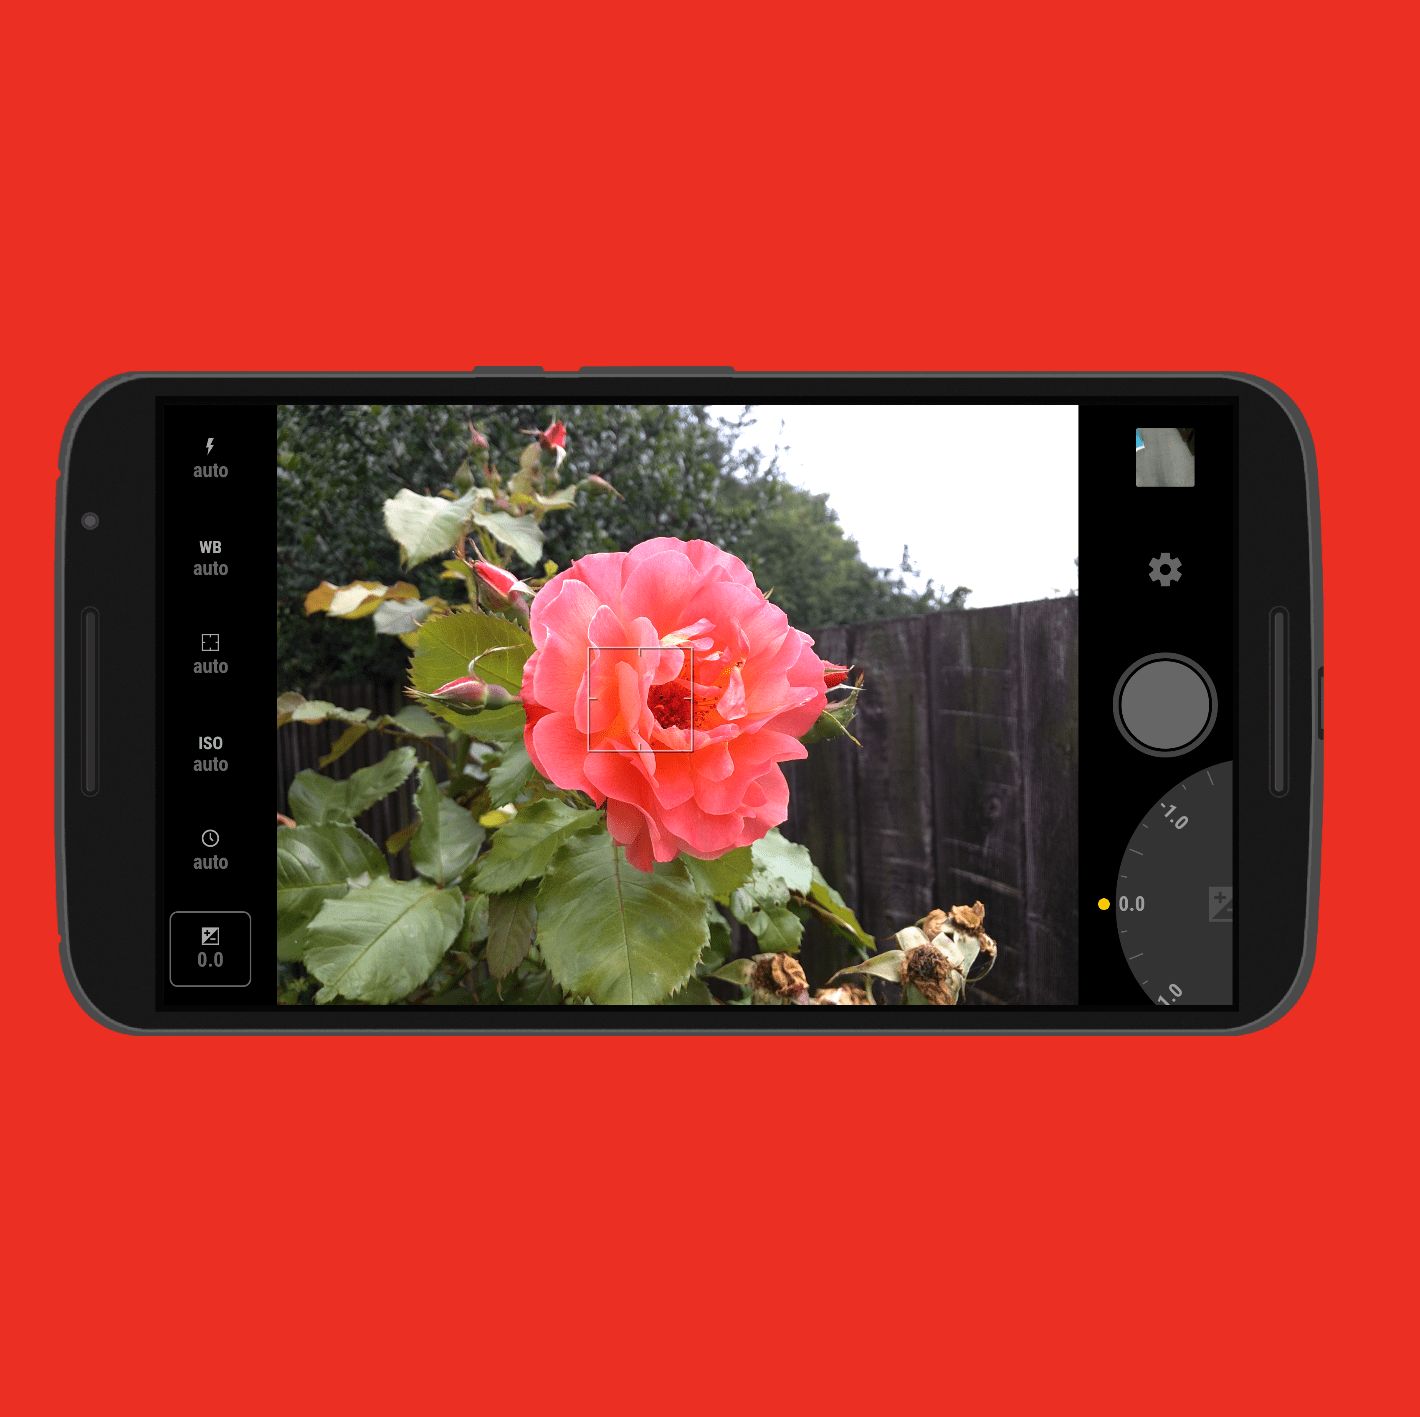
Looking at the interface, there are a lot of ‘bells and whistles’ to play around with, but it is fairly simple to get your head around and start taking some amazing photos with your phone. On the left hand side of the manual camera app, there is a bar with 6 different modes which you can adjust so that you can take the best picture possible. The first toggle is to change the flash settings, so you can have it either have flash on, on auto or off. This is quite common in most stock camera apps as it is a basic setting.
The next one is ‘White Balance’ this is a process of adjusting the color balance so that colors which appear white are actually rendered white in the photo. By adjusting the white balance you will be able to make you photo more realistic.
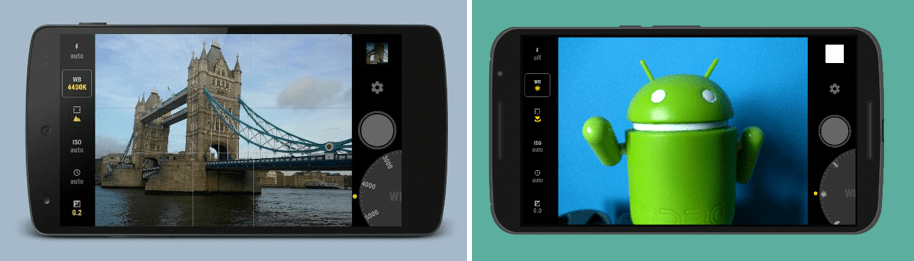
There is a dial in the bottom right hand corner, and when you select a mode which you would like to change you can spin the dial by spinning it, (as you can see in the picture above). This works with all the settings so it is super easy to adjust each of the different toggles. Since the release of the Manual camera app in early January in 2015, there has been a few updates as there were some bugs. But from the second picture above you can see that they have set modes for the white balance as before if you wanted to toggle white balance it would blow everything it of proportion and so the setting was not functional.
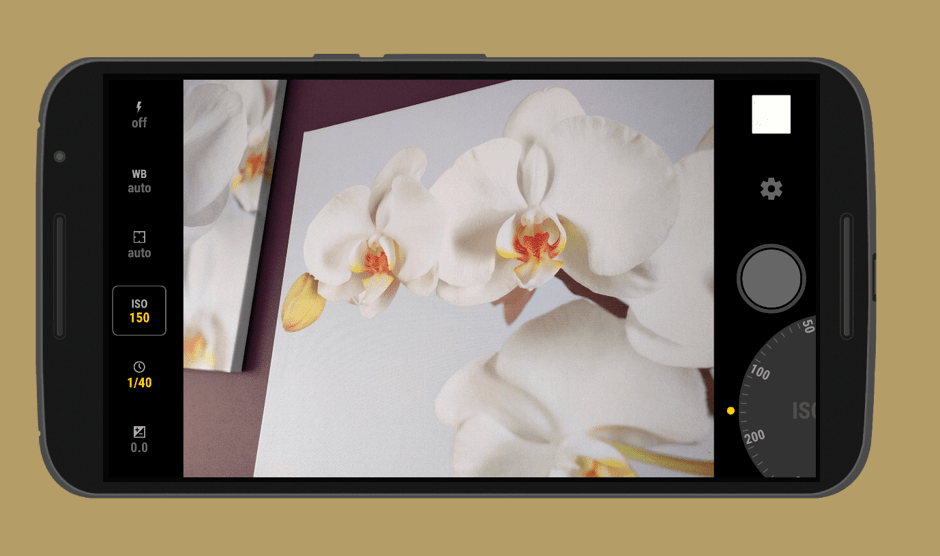
ISO is the sensitivity level of your camera to light, the lower the number the less sensitive it will be to light and vice versa. Setting ISO high helps in low-light situations like indoors as it helps to so reduce noise, and therefore result it a clearer picture at night. Changing the ISO also changes shutter speed, so that you can capture images fasters. Another situation where you might want to increase ISO is when you need to take ultra-fast shots like capturing a bird as it is flying, but before doing this you should take into consideration that the higher ISO you use the more noise you introduce to your photos.
The bottom toggle in the left hand corner, is exposure compensation which allows you to tweak the exposure slightly. This could be because of uneven lighting distribution, filters, variations is the camera system or intended under or overexposure. Cinematographers may use this as its own manual effect which they can tweak manually, instead of changing it is post production.
Other Features:

There are some other features which also help with your phone photography, by clicking on the gear icon similar to the one in the picture above, in the bottom right. You will be greeted with a slide out menu with other settings.
The first is to switch between the front facing camera and the back facing camera, for those amazing selfies! Next is the brightness toggle setting so that you can quickly set the brightness to full for those outside photography without going out of the app. Further down there’s a symbol that looks like a #, and this setting toggles the different grids which you can have over your viewfinder. These are the different grids which can assist you in lining things up on your camera to perfect your photo.

The rule of thirds and The Golden Ratio are similar as they are a set of lines and subjects can be placed on the intersecting lines and the horizon can lie on the top or bottom horizontal lines. This helps to focus the subject which is being photographed stand. By placing a detail of interest in the intersecting lines it helps to draw the attention of the viewer into the picture.
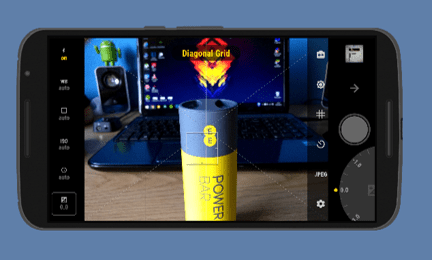
The Diagonal Grid also helps with photography as you can place a detail of interest on one of the four bisecting lines and therefore the attention will be drawn to them.
The 4th icon is a self-timer which can be pressed so that you can choose from any of the preset times from 2 secs or 10 secs. These can be handy when trying to take a group photo including all your friends or family. This next one is very important as this is one of the only camera that allows you to change the file in which the pictures are saved as. If you select it you can choose from JPEG which is the default option or RAW. There are many benefits when it comes to shooting in RAW format:
- Shooting photos in RAW means that you record all of the data from the sensor. This gives the highest quality files. As you are shooting in RAW you have more information on the file which means that you can edit the image fully without any reduction in quality.
- You can easily adjust the white balance, as it isn’t just applied to the image as it would be if you were shooting in JPEG format.
- You can get better detail, this means that you have access to sharpening and noise tools in programs like light rooms that are way more powerful than most photo editing apps.
- You will be able to make changes to your RAW file with ease as you won’t actually be changing any of the original data.
- Your printed photos will look even better because of the finer gradient of tones and colors.
You also have the option to shoot in both JPEG and RAW files.

Finally, you have the gear icon again which, takes you to some other settings, like turning on and off GPS location, for geo-tagging. Gives you option to toggle sounds on and off and also you can change from two white balance modes. These are Kelvins and Presets, the presets were part of the update in April, but I still have had no luck with the Kelvins as it is still very buggy on my nexus 6. There is a neat trick with this app as it is full screen ‘immersive mode’ by holding the back button highlighted to the gear icon in the main viewing mode it will exit you out of the app instead of you having to swipe up from the bottom and selecting the back button.
Thanks for taking the time to read this post and we sincerely hope you found it helpful and enjoyable! Please feel free to leave your thoughts down below in the comments and don’t forget to subscribe to Bane Tech on YouTube, Google+, Facebook, Twitter & Instagram!

- How to get Adaptive Icons on any Android Device - September 11
- Back To School Guide 2017 - August 21
- Enable Grayscale Mode on your Pixel or nexus device – No Root Needed - August 7

